前言
爬了两天的坑终于上来了,看别人写的很简单,自己写的时候就各种问题,网上SSO文章很多,写的时候就各种问题(自己太菜了)。记录一下,以后方便查看。
关于OAuth2认证和授权服务器见上一篇
https://zheyday.github.io/2019/10/07/SpringCloud-OAuth2%E5%92%8CJWT/
项目地址:
https://github.com/zheyday/SpringCloudStudy
使用git工具
参考资料:
https://www.cnblogs.com/cjsblog/p/10548022.html
阮一峰OAuth2讲解
https://blog.csdn.net/WSM960921/article/details/98222004
什么是SSO
英文全称single Sign On,中文名单点登录。就是在多应用系统中,用户只需要登录一次就可以访问所有信任服务。SSO通过将用户登陆信息映射到浏览器cookie中,解决其他服务免登陆获取用户session的问题。
大体框架
项目中一个有5个模块:
oauth-server是认证和授权服务,负责令牌的发放
zuul是网关服务,实现统一授权
eureka-client和eureka-client1是两个应用服务
eureka-server-single是eureka注册中心
要实现的功能就是通过zuul端口访问eureka-client,首次需要登录,然后内部跳转到oauth-server中进行认证和授权,成功之后也可以不用登录访问eureka-client1。
oauth-server
详见
https://zheyday.github.io/2019/10/07/SpringCloud-OAuth2%E5%92%8CJWT/
更改了几个地方
AuthorizationServerConfig
1
2
3
4
5
6
7
8
9
10
11
| @Override
public void configure(ClientDetailsServiceConfigurer clients) throws Exception {
clients.inMemory()
.withClient("zuul")
.secret(new BCryptPasswordEncoder().encode("secret"))
.scopes("app")
.authorizedGrantTypes("authorization_code", "password")
.redirectUris("http://localhost:9110/login")
;
}
|
UserController
这个函数可以为其他模块资源服务器提供校验
1
2
3
4
5
6
7
8
| @RestController
@RequestMapping("/oauth2_token")
public class UserController {
@GetMapping("/current")
public Principal user(Principal principal) {
return principal;
}
}
|
ResourceServerConfig
1
2
3
4
5
6
7
8
9
| @Override
public void configure(HttpSecurity http) throws Exception {
http
.antMatcher("/oauth2_token/**")
.authorizeRequests()
.anyRequest().authenticated()
;
}
|
application.yml
添加了根地址,也就是每次访问这个服务都要加上 /oauth-server
1
2
3
4
5
6
| server:
port: 9120
# url根地址 不配置的话会报invalid_token错误
# 或者在zuul中配置也可以
servlet:
context-path: /oauth-server
|
Zuul
zuul作为系统的入口,提供路由、统一授权等功能。
依赖见项目中
注意:所有模块都引入了spring-cloud-starter-oauth2依赖,所以放入了项目的公共pom.xml中,实现oauth2只需要引用这一个就可以
application.yml
贴出主要配置,详细见项目中
sensitiveHeaders:这个必须要。zuul在转发路由时,会改写request中的头部信息,设置成空就是不过滤
security.oauth2.resource:这个是和解析令牌相关的配置
资源服务器需要解析令牌验证正确性,方式有三种:
- 如果令牌不是jwt非对称加密,那么访问/oauth/check_token直接验证token;
如果是非对称,访问/oauth/token_key获得公钥进行解析
- 访问认证服务器中的controller中的方法,获得Principal进行验证
- 在资源服务器本地配置,继承ResourceServerConfigurerAdapter接口,实现和认证服务器相同的加密方式
1
2
3
4
5
6
7
8
9
10
11
12
13
14
15
16
17
18
19
20
21
22
23
24
25
26
27
28
29
30
31
32
33
34
| zuul:
routes:
eureka-client:
path: /eureka-client/**
sensitiveHeaders:
serviceId: eureka-client
eureka-client1:
path: /eureka-client1/**
sensitiveHeaders:
serviceId: eureka-client1
oauth-server:
path: /oauth-server/**
sensitiveHeaders:
serviceId: eureka-client
oauth-server: http://localhost:9120/oauth-server
security:
oauth2:
client:
client-id: zuul
client-secret: secret
access-token-uri: ${oauth-server}/oauth/token
user-authorization-uri: ${oauth-server}/oauth/authorize
resource:
jwt:
key-uri: ${oauth-server}/oauth/token_key
|
配置WebSecurityConfig
整个zuul模块只要添加这一个配置就可以
1
2
3
4
5
6
7
8
9
10
11
12
13
14
15
| @EnableOAuth2Sso
@Configuration
@EnableWebSecurity
public class WebSecurityConfig extends WebSecurityConfigurerAdapter {
@Override
protected void configure(HttpSecurity http) throws Exception {
http
.authorizeRequests()
.antMatchers("/login").permitAll()
.anyRequest().authenticated()
.and().csrf().disable()
;
}
}
|
eureka-client(资源服务器)
application.yml
新添如下,用于验证请求的令牌是否正确
1
2
3
4
5
6
7
8
9
10
11
12
| security:
oauth2:
resource:
id: eureka-client
jwt:
key-uri: ${oauth-server}/oauth/token_key
|
配置ResourceServerConfig
资源服务器只需要添加这一个配置即可
1
2
3
4
5
6
7
8
9
10
11
12
13
14
15
16
17
18
19
20
21
22
23
24
25
26
27
28
29
30
31
32
33
34
35
36
37
38
39
40
41
42
| @Configuration
@EnableResourceServer
@EnableGlobalMethodSecurity(prePostEnabled = true)
public class ResourceServerConfig extends ResourceServerConfigurerAdapter {
@Override
public void configure(HttpSecurity http) throws Exception {
http
.authorizeRequests()
.anyRequest().authenticated()
.and().csrf().disable();
;
}
}
|
注意:
如果使用本地验证方法,可能会报读取不到oauth2.jks的错误,因为默认不引用resources目录下的文件,需要在pom.xml中<build>下添加配置
1
2
3
4
5
6
7
8
| <resources>
<resource>
<directory>src/main/resources</directory>
<includes>
<include>**/*.*</include>
</includes>
</resource>
</resources>
|
测试
启动顺序:
- eureka-server-single
- oauth-server
- zuul
- eureka-client和eureka-ciient1
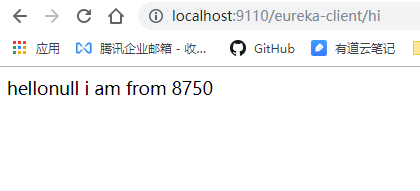
通过zuul端口访问eureka-client下的方法 http://localhost:9110/eureka-client/hi
会自动跳到oauth-server的登陆页面,输入用户名和密码登陆

看url,跳转到了oauth/authorize,这是授权接口,并且后面携带了一些zuul配置的信息

成功

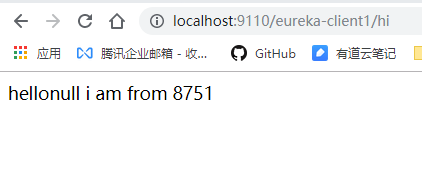
访问eureka-client1不需要登陆

总结
写的比较简洁,但是做出来真的花费了两天的时间精力(还是太菜了)
没有什么文采,原理性的东西也写不出来,只能记录一下实践,大家共同交流


